Installation Guide
Installing CI-GLPAC
To change IP settings from Toolbox > Text Console, type these commands:
dhcp off
ipa 0 10.0.0.10
ipm 0 255.255.255.0
defr 0 10.0.0.1
Loading the Program
If a load script was provided:
Open Toolbox > Script Manager and right click in the empty space, then select the top option: "Load Script..."
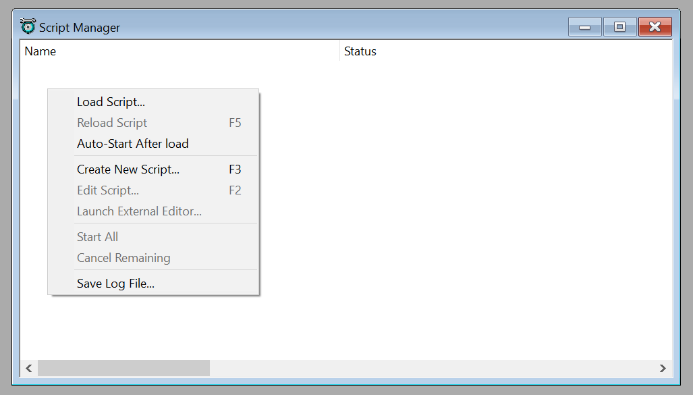
Select the file "GLPAC_LoadScript.txt" to populate the tool with operations. In most cases this will be just "GLPAC" which loads the program via USB.

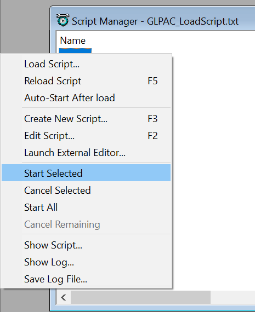
Double click an entry to run it, or right click and "Start Selected". This will execute the script and the Status column will update as the script progresses.
Answer "Yes" to the following prompts
CI-GLPAC works for all models of GLPAC

GLPAC firmware hasn't been updated since 2013
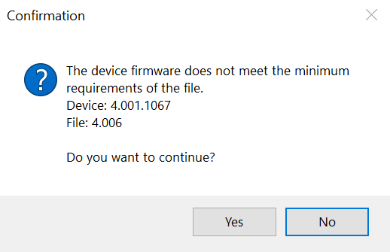
Answer "Yes" to overwriting the IP Table, the existing table from the default program is irrelevant.
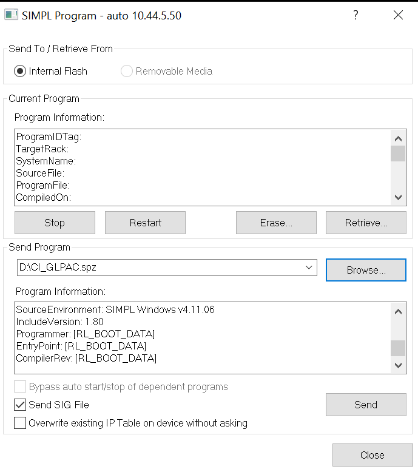
Alternatively Loading through Text Console:
Using File Manager, copy the contents of the NVRAM folder into the NVRAM folder of the GLPAC. (These files are read on program load, so do this before or the program needs to be restarted)
Using Text Console, connect to the GLPAC and click the lightning bolt in the bottom left, then select SIMPL Program
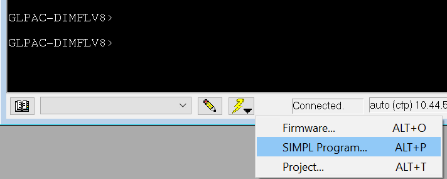
Browse for the .spz file and click "Send". Make sure to check the "Send SIG File" box at the bottom to allow future debugging if necessary.
Once the program is loaded, use Toolbox > Network Device Tree to change the Cresnet IDs of the attached devices